I’ve been doing a fair amount of charcuterie at home of late. Although I always do some, it seems that recently, I’ve always had a project going. I’ve been making bacon and pancetta on a regular basis for more than a year and had dabbled with some brine cured hams and things like tasso, but hadn’t really done much curing of other cuts of pork.
Recently, my wife bought a few boneless pork sirloin roasts at a good price. They were about a pound and a half each. My wife isn’t that familiar with various cuts of meat and is apprehensive of buying cuts that she doesn’t specifically know about lest I disapprove and give her a meat lecture using one of the dogs to model where different cuts are from, which normally gets me in a bit of trouble, (though the dog doesn’t seem to mind his part). But the price on these was so good, she decided to give it a shot (after all, they’d make fine dog food if I didn’t want to use them). Sirloin is normally roasted or cut into chops. I did a bunch of research and couldn’t find anyone who had recipes for curing sirloin. The two pieces were about two inches thick and I thought that they’d be fine for curing in a similar manner to pork belly, so I decided to give it a shot.
I coated the outside of one of them with molasses and then added the basic salt/pink salt/sugar cure I normally use. Then I put it in a zip lock bag in the fridge. One thing I have learned in salting and curing is that it’s easy to overestimate how much salt you need. The first few times, I completely coated the cuts which lead to incredibly over salted finished products. It’s hard to describe how much to put on. It’s something you really need to learn by doing it, but eventually I realized that time is more important than the quantity of salt. I light coating will penetrate the meat given enough time. Cuts 2-3 inches thick normally cure in about a week for me. So, you can start it one weekend and finish it the next.
I took my “ham” out of the ziplock after a week, and then washed it well to remove the surface salt. The color had changed and the meat had firmed up. I left it on a cake rack to dry for about 90 minutes before I put it on the smoker. I have a small smoker. It’s nothing fancy. It’s essentially a small metal box with an electric burner in the bottom. You put a small metal pan filled with wood chips on the burner and eventually you get smoke. Because it’s outside, the temperature in the smoker is largely dependant on the ambient temperature outside. In the winter, it gets to about 80-90 degrees inside. On a hot summer day it gets up to about 125 or so. It was a decent spring day (one of the few we’ve had so far) and I put it in the smoker and added some apple wood chips.
Smoking is an art, and it’s not one that I think I’ve mastered by any means. I have found that I prefer fruit wood for most of the things I smoke. I also like hickory for more traditional barbecue type of things. Apple has become the de facto wood for so many small bacon producers (just check out the bacon at any high end retailer and it’s likely apple smoked), but I’ve also used cherry with nice results. This being the northwest, I also have some alder, but it’s something that’s traditionally used more for fish than anything else.
Smoking does a couple of things. Most of us just think about the actual smoke flavor that it gets, but from a curing and preserving stand point, there’s another more important process that happens during smoking. Smoking helps to reduce the water content, which is essential for long term preservation of meat. As meat smokes, it loses water weight and the texture of the meat firms up. That’s why hams are firmer than fresh cuts. For the small scale curing that I do, where I rarely cure anything more than about 4 or 5 pounds, I can smoke things in a single day. I generally give things between 6-12 hours on the smoker. I’d like to say it’s dependant on the cut, size, etc, but just as often it’s determined by how early I get the meat in the smoker.
In my early attempts at smoking, I always over smoked everything by using too much wood. You don’t need a constant stream of smoke. If the chips in the pan burn away, it’s fine. I will refill it partially every few hours, but even if the pan is empty, the drying process continues. The gentle heat from the burner creates an updraft in the burner, which helps to carry away moisture form the meat. If you over smoke the meat, you can end up with a bitter coating on the outside of the meat. Again, time is more important than the amount of chips. Both curing and smoking aren’t things you can rush. Using extra salt and or more chips won’t compensate for the lack of time.
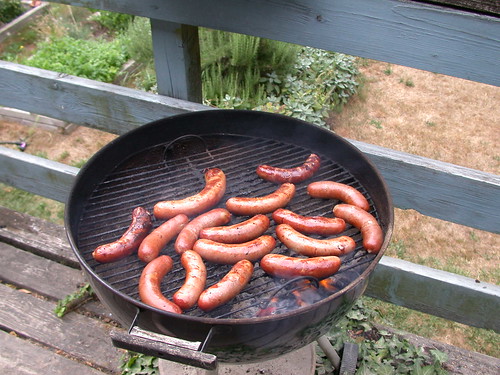
I left this first “ham” on the smoker for about 8 hours and then finished it on the Weber grill where I let it get to an internal temperature of about 155. It was completely firm and when I cut into it, it was a beautiful red color all the way through. The outside had a mahogany patina to it. It tasted wonderful. It was a little saltier than I wanted but not overdone. The smoke flavor was prominent but the outside pieces didn’t taste bitter or resiny. It was certainly better than anything you could buy at the normal supermarkets. You could order a real country ham that was better, but for $1.48 a pound I was pretty well pleased. (And the leftovers made great omelets.)
I have another one curing now and will smoke it this weekend. Last weekend, I finished some maple cured bacon. I used maple syrup as a base and then salted the meat. It was left on the smoker for about 10 hours and came out perfectly. It’s probably the best bacon I’ve made. Unfortunately, the finished weight was only about a pound and a half. It’s interesting using different sweeteners in the process. Even after a week of curing and 10 hours of smoking, you could still smell the maple syrup on the bacon and it still had a slight maple flavor as well. The molasses cure is a little heavier, but works well with ham. I think it might be a bit much for bacon tough.
The most recent Saveur magazine had an article of curing salmon, which I’ve never done but may in the next few weeks.
Thursday, June 12, 2008
Charcuterie Update - Making Hams at Home


Wednesday, August 29, 2007
A Sausage Making Primer
Making sausage at home isn’t hard. The basic thing to remember is that sausage is essentially just ground meat mixed with salt and seasonings of some kind. It doesn’t have to be stuffed into casing and it doesn’t even have to be formed into patties. The basic idea is to take tough cuts of meat and grind them in order to make them easier to cook and eat. You can make perfectly serviceable sausage by buying ground pork, beef, lamb or poultry and then spicing it yourself.
But of course, the more of the process you get involved in, the better the end result and the more control you’ll have over the whole process. You don’t need a huge amount of equipment but a meat grinder is helpful as is some kind of stuffing attachment if you want to make links. I have a Kitchen Aid mixer and use their grinder and sausage stuffing attachment which is fine. The grinder isn’t ideal in that the knife blades are difficult to sharpen and sometimes the results seem less like ground than slightly torn or pulverized, but it’s OK for most applications. If you really get serious, get a good grinder and take good care of the grinding knife.
If there is one primary rule in making sausages, it’s to keep everything very cold (bordering on or slightly freezing). This includes the grinder and stuffer, as well as the meat. In fact, the meat should be slightly frozen to cut a good grind and to keep from getting “smear.” Smear is the sausage maker’s nightmare and it’s to be avoided at all costs. Most sausage is about 25-30% fat. Smear occurs when the fat gets broken down and is smeared into the meat. The fat separates and when the sausage cooks, the fat and meat separate resulting in stringy, pasty meat and pools of fat (plus they make the sausage shrink and you can see big pools of fat in the casings, yuck). If you keep everything during grinding, mixing and stuffing you’ll be fine, but that’s why sausage making is best done in a few steps: grind the meat and then re-chill it in the freezer; mix the meat and the spices and then re-chill it; and then stuff them.
Most home grinders come with two different size plates: 3/8 and 1/4 inch. 3/8 is the better grind for coarser styles like Italian sausage, chorizo, etc, but I generally prefer the 1/4 plate for brats. If you can only choose one size, though, go with the 3/8 grind which is like a chili grind from the supermarket. If you want really coarse, rustic sausages, hand cut a portion of the meat into tiny cubes. I normally will hand cut about 1/3 of the meat for a coarser more rustic look. 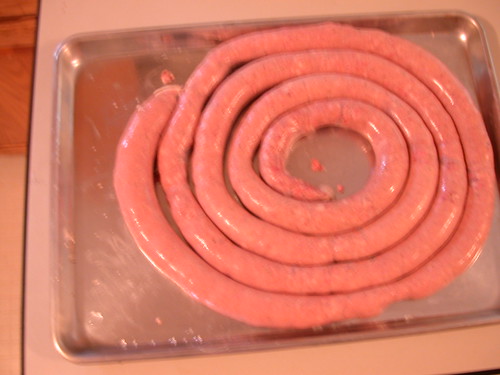
Salt is essential for any sausage and quantities vary but a good rule of thumb is one teaspoon of salt per pound of meat, but some varieties will be considerably higher. There’s a big debate about “pink salt” because it contains nitrites. If you’re going to cold smoke your sausages for any length of time, use nitrates, because botulism is a real threat and scary reality. Cold smoking normally means smoking food between 80and 100 degrees. Botulism requires moisture and an absence of oxygen to grow, and a cold smoker is a perfect environment for it. If you wouldn’t leave thawed meat out on the kitchen counter on a hot summer day for 8-12 hours, then you probably should add pink salt to your sausage. Pink salt is premeasured and generally contains 94% salt and 6% nitrite. One level teaspoon per five pounds of meat is plenty to keep botulism and other nasties at bay. If you’re going to make sausage that’s going right onto the grill or that will be hot smoked at higher temperatures don’t bother. 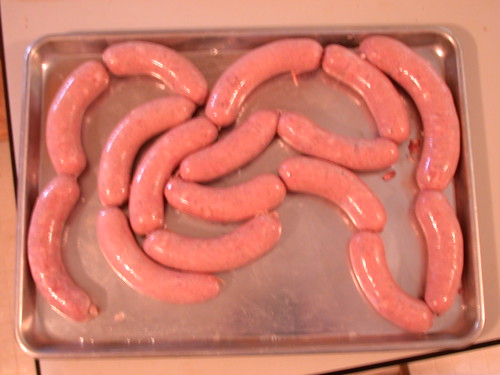
When you get started it pays to use some recipes at first until you’ve done a few batches, at which point I would encourage you to go hog wild and add whatever sounds good. There are several great resources to check out. For supplies, The Sausage Maker and Butcher and Packer are both reputable and reliable sources. For books, check out Michael Ruhlman and Brian Polcyn’s Charcuterie which is a masterpiece for both beginners and advanced sausage makers. A great book for beginners is Bruce Aidell’s Complete Sausage Book, which will teach you to make sausages and will also give you recipes to use them in. The old school bible for sausage makers (which is geared more to professionals, but is well worth tracking down) is Rytek Kutas’s Great Sausage Recipes and Meat Curing. The recipes are generally for 10, 25 and 100 pound batches, but they scale down nicely. There’s a great web site by a gentleman named Len Poli which is a terrific resource as well. 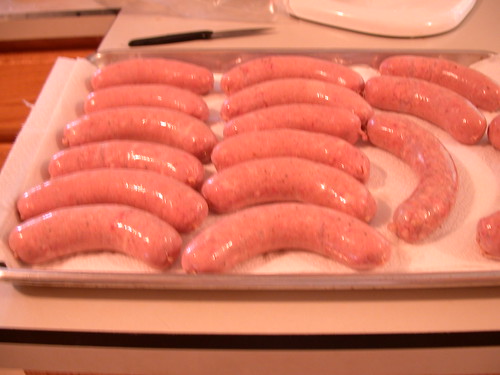
A few more tips if you haven’t tried this yet. Start with a basic fresh sausage, whether it’s a breakfast variety, sweet Italians, Brats, etc. Dried cured sausages like salami are very difficult and require temperature and humidity control and can require bacterial cultures as well. Emulsified sausages like weisswurst and frankfurters are do-able but have their own special challenges and aren’t the best type to try for your first batch. I normally make pork sausage, and I generally some cut from the shoulder (shoulder roasts or Boston butts are great). If you want beef, go with chuck. These cuts will give you enough fat without having to find fat back, which is a special order unless you have a really good butcher. If you use chicken, use thighs and tried to use some skin as well or they may be a bit dry.
So give it a try and you’ll likely be well rewarded by your efforts.